
CloudFormation Custom Resource Repo.
I’v been writting a lot of custom resources lately.
Ready to Try it out?

Feel free to use bryanlabs defaults for lambda-code bucket/prefix and object versions.
Or grab the build scripts and Template Source to use your own hosted version of the code.
HOW IT WORKS
After you have deployed the stack, you should create JSON payloads to define one or more AMI(s).
{
    "amis": [
        {
            "imageName": "Webserver",
            "sourceImage": "ami-0de53d8956e8dcf80",
            "bootstrapUrl": "https://raw.githubusercontent.com/bryanlabs/aws-amifactory/master/bootstrap/webserver.sh",
            "accounts": [
                "CHANGEME"
            ],
            "automationDocument": "DefaultLinuxAmiDocument"
        }
    ]
}
Payload schema
- imageName - The name of your image.
- sourceImage - The trusted image to start from.
- bootstrapUrl - the URL to a script which will configure your image.
- accounts - A list of AWS account numbers to share the AMI with.
- Automation Document - Creates and configures the new AMI.
Build AMIs
Now that you have a payload defining your AMIs, you can use them to invoke the Lambda function. This Lambda function can be triggered multiple ways. In this article we will use both a Lambda Test event and CloudWatch Schedule Events to invoke the buildAmi Function.
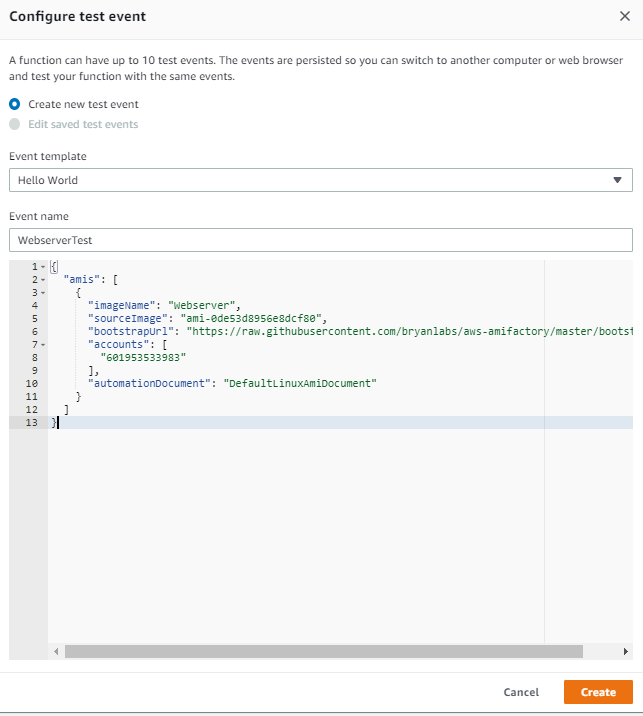
Create a Lambda Test Event
From within Lambda, click the buildAmi function click ‘select a test event’, then click configure test events. Choose an Event name like webserverTest, paste in the json payload example and click create.
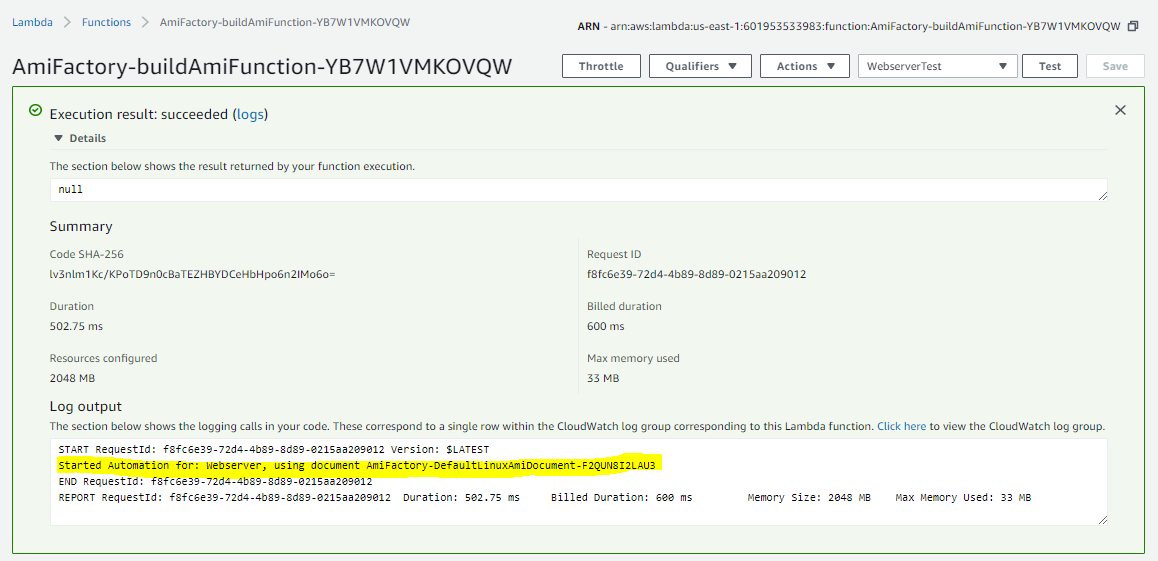
Click Test Event
Now that the test event is created, we can invoke it from the Lambda console. Make sure to select the WebserverTest event, and click Test.

Notice Automation Started
If all goes well, you should see a green dialog box that says Execution result: succeeded. In the Log output below, you will see which AMIs have started building.
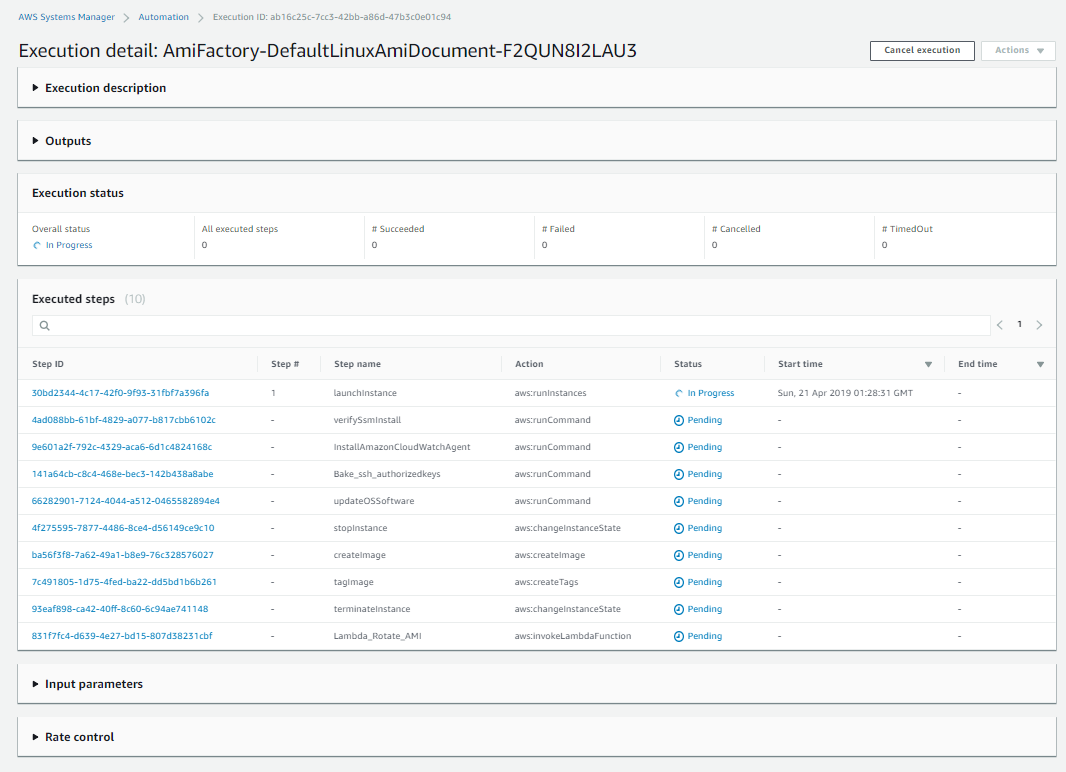
View Automation Steps
From the main services page, click Systems Manager, then automation. You should see one in progress. Click the execution ID to watch it build.
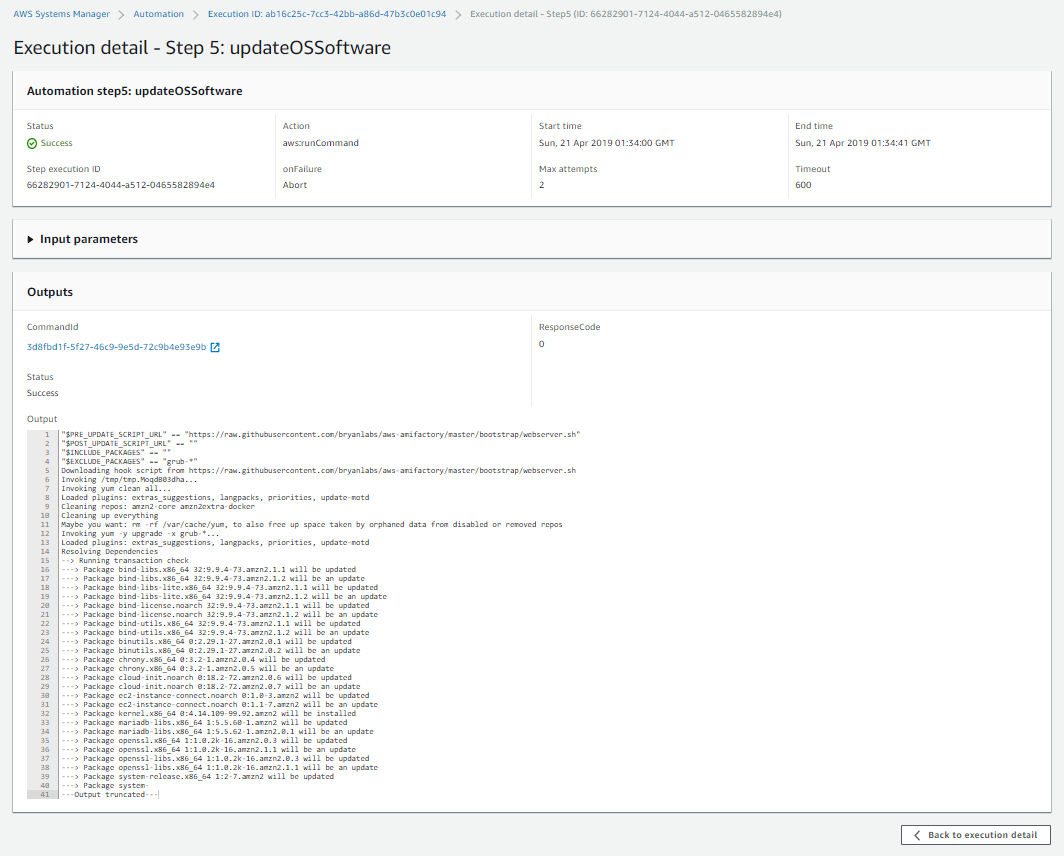
View Execution Details
You can further inspect each step and see the details such as which software packages were updated.
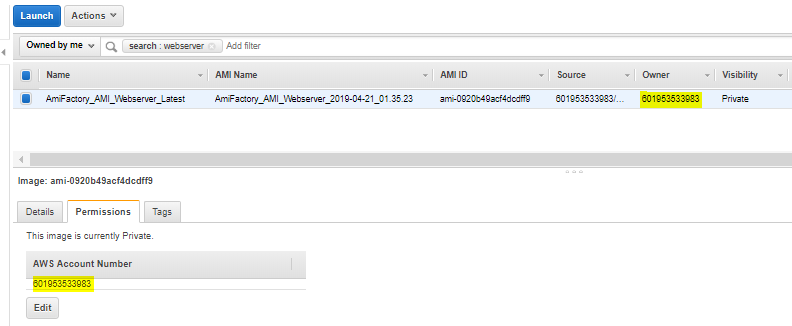
View Image List
Once the Automation completes, you can verify the Image exists by going to the services page, then EC2, then Images/Amis. You should see your image at the top of the list. If you click it, you can see the permissions of which accounts are allowed to access that Image.
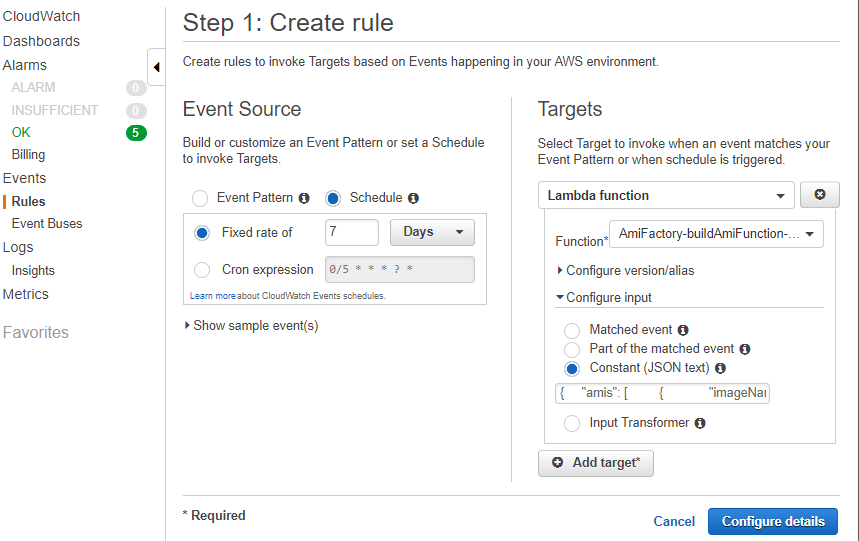
Use CloudWatch to Schedule builds of AMIs.
We recommend building images on a schedule with CloudWatch Events.
Create Rule
From the services page, click CloudWatch, Rules, then Create Rule. Choose Schedule for the Event source, Fixed rate of 7 days, or whatever your preference is. Add a Target to the build ami lambda function. Configure input of constant JSON text and paste in the example payload. Next Configure details.
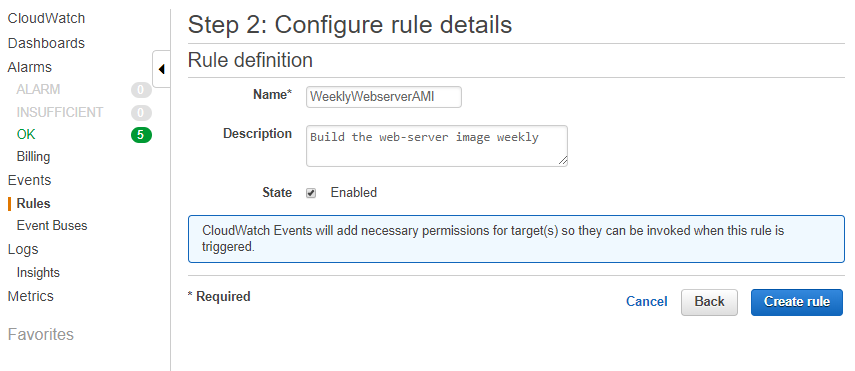
Configure Rule Details
Choose a name and description for the rule, then click create. Now your Images will build according to the schedule you defined.
Lock Down the IAM Policies to only allow AMI Factory Images
The last step is an optional one. One common way to ensure users are only launching approved images is to use an IAM Policy to Deny access to non approved Images. The example below is a simple IAM policy that can be attached to an IAM user to prevent them from running instances not created by the Amazon Factory.
{
    "Version": "2012-10-17",
    "Statement": [
        {
            "Sid": "DenyAMIAccess",
            "Effect": "Deny",
            "Action": [
                "ec2:RunScheduledInstances",
                "ec2:RunInstances"
            ],
            "Resource": "arn:aws:ec2:*::image/ami-*",
            "Condition": {
                "StringNotEquals": {
                    "ec2:Owner": [
                        "AMIFactory_account_id_here"
                    ]
                }
            }
        }
    ]
}